A Sneaky Culprit: The Coolant Leak
Picture this, mate. You’re cruising down the road in your motor, feeling like the king of the world. But suddenly, you notice something ain’t right – that pesky engine temperature gauge starts creeping up into dangerous territory. Before you know it, steam is billowing from under the hood like an overexcited kettle on a Sunday morning.
Fear not, my friend! You might just be dealing with a coolant leak – one of those sneaky culprits that can turn your joyride into a nightmare. Lucky for you, I’m here to spill the beans on how to identify and fix this automotive annoyance.
The Telltale Signs: How to Spot a Coolant Leak
If there’s one thing about coolant leaks, they sure know how to make their presence known. Keep an eye out for these telltale signs:
- Puddles Under Your Motor: If you spot neon-green or orange puddles forming beneath your vehicle after it has been parked for some time, chances are high that your coolant is making its grand escape.
- An Overheating Engine: Is your temperature gauge skyrocketing? Does steam start hissing at you when you pop open the bonnet? Well then, old chap, it’s time to investigate further as these symptoms often point towards a coolant leak.
- Sweet Smells and White Smoke: No need for Sherlock Holmes’ detective skills here! If there’s an oddly sweet smell lingering around your car or white smoke coming from under the hood, it’s a clear sign that your coolant is playing hide and seek.
Now that you’ve got your detective hat on, let’s move on to fixing this nuisance.
The Fix: How to Mend a Coolant Leak
Before you dive headfirst into the repair process, make sure you have these essential tools at hand:
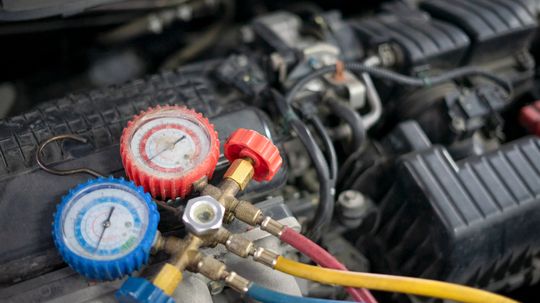
- A Pressure Tester: This handy device will help you identify the exact location of the leak by pressurizing your cooling system. Think of it as an automotive bloodhound!
- Coolant Sealants or Epoxy: These magical potions can work wonders in sealing up small leaks temporarily until you can get proper repairs done. Just remember, they’re not meant to be long-term solutions!
- New Hoses or Gaskets (if needed): In some cases, damaged hoses or gaskets might be causing the leak. If that’s the case for you, grab some replacements before getting down and dirty with repairs.
To fix a coolant leak like a true pro, follow these steps:
- Detecting the Leak: Use your trusty pressure tester to locate where exactly that sneaky coolant is escaping from. Keep an eye out for any cracks or holes in hoses, radiators, water pumps – anywhere along the cooling system really!
- Mending Small Leaks Temporarily: If you spot minor leaks during your investigation and don’t have immediate access to professional help, apply some coolant sealant or epoxy as a temporary fix. Remember though – this won’t solve all your problems permanently!
- Patching Up or Replacing: For larger leaks or damaged components, you’ll need to patch up the affected area using appropriate sealants or replace the faulty parts altogether. Don’t be shy about seeking professional assistance if needed!
- Refilling and Testing: Once all repairs are done, top up your coolant levels and run your engine for a while to ensure everything is back in working order. Keep an eye out for any signs of leakage during this test phase.
In Conclusion: Keeping Cool with Coolant Leaks
Coolant leaks may seem like pesky troublemakers, but armed with the right knowledge and tools, you can tackle them head-on. Remember to stay vigilant for those telltale signs – puddles under your motor, overheating engines, sweet smells, and white smoke.
If you do find yourself facing a coolant leak conundrum, fear not! With a pressure tester in hand and some temporary fixes up your sleeve (courtesy of coolant sealants), you’ll be well on your way to resolving the issue. And remember – when it comes to major repairs or replacements, don’t hesitate to seek help from professionals who speak fluent car language.
So go forth now with confidence! Spot that sneaky culprit known as a coolant leak and fix it like a true automotive hero!


