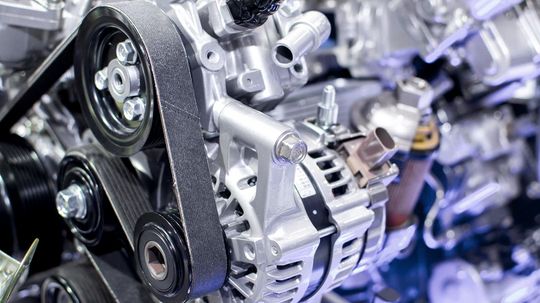
Discover the Simple Steps to Replace Your Car’s Serpentine Belt and Keep Your Engine Running Smoothly
Avoid Costly Repairs by Taking Charge of Your Car’s Maintenance
Maintaining your vehicle is essential for its longevity and performance. One crucial aspect that often goes unnoticed is the serpentine belt, responsible for powering various engine components such as the alternator, power steering pump, and air conditioning compressor. By learning how to replace this vital component yourself, you can save money on expensive repairs while ensuring your car runs smoothly.
Gather the Tools You’ll Need for a Successful Replacement
Before diving into replacing your car’s serpentine belt, make sure you have all the necessary tools at hand. These typically include a wrench or socket set, a pry bar or tensioner tool (specific to your vehicle), safety goggles, gloves, and a replacement belt that matches your car’s specifications. Having these items ready will streamline the process and prevent any unnecessary delays.
Familiarize Yourself with Your Vehicle’s Specifics
Every car model has unique features when it comes to accessing and replacing the serpentine belt. Consult your vehicle owner’s manual or an online resource specific to your make and model before starting. Understanding where key components are located will help you navigate through potential obstacles during the replacement process.
Carefully Remove Old Belt & Install New One Step-by-Step
To begin replacing your serpentine belt safely:
1. Locate the tensioner pulley: This small wheel applies pressure on the belt system; use either a wrench or tensioner tool to release tension from old belt.
2. Slide off the old belt: Once tension is released, carefully slide the old belt off each pulley, making note of its routing path for later reference.
3. Install the new belt: Referencing your vehicle’s manual or online resource, route the new serpentine belt along each pulley according to the correct pattern.
4. Apply tension and check alignment: Use your wrench or tensioner tool to apply pressure on the tensioner pulley again, allowing enough slack to install the new belt correctly. Ensure that it aligns with all other pulleys before releasing tension.
Conclude Your Replacement Process with a Thorough Inspection
After successfully installing your car’s new serpentine belt:
1. Double-check routing accuracy: Verify that the new belt follows precisely in line with each pulley as indicated by your vehicle’s manual.
2. Inspect for any damage or wear: Take this opportunity to examine other components driven by the serpentine belt, such as idler and tensioner pulleys. Replace any damaged parts if necessary.
3. Start up your engine and listen closely: Turn on your car and pay attention for any unusual noises coming from under the hood while ensuring proper functionality of all powered systems (e.g., alternator charging).
In Conclusion
By taking charge of replacing your car’s serpentine belt using these simple steps, you can save money on costly repairs while maintaining optimal performance for years to come. Remember always to consult reliable resources specific to your make and model before starting any maintenance task on your vehicle – empowering yourself with knowledge ensures a smooth ride ahead!


